With basic knowledge, you can easily adjust the tension of the springs of your garage door. But wait, there are mainly 2 different types of garage door springs. And each needs different tactics in adjustment.
But don’t worry. In this comprehensive guide, we will discuss every step for how to adjust garage door springs, no matter the spring types. So, without any further ado, let’s start.
Why Garage Door Springs Need Adjustment
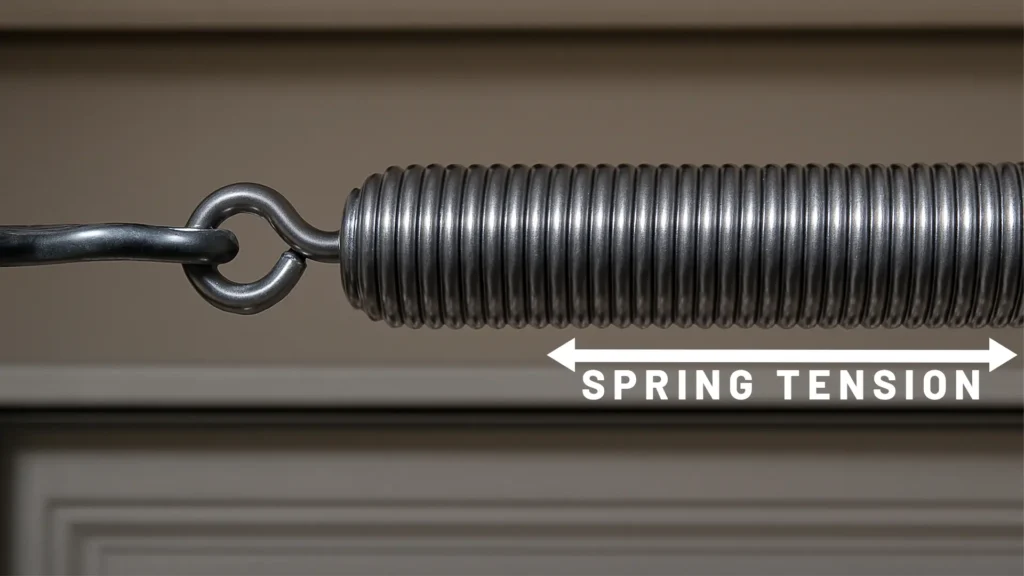
Garage door springs are under high tension because they counterbalance the weight of the door. Over time, they lose tension or become uneven, leading to problems like:
- The door not staying open
- Jerky or sluggish movement
- Noisy operation
- Door closes too quickly
Regular maintenance, like lubricating the garage door and timely adjustments, help extend the life of the door and springs while improving safety.
How Do Garage Door Springs Work?
Springs store mechanical energy. When the door closes, the springs stretch or twist to store energy. When the door opens, they release it to assist in lifting the door.
There are two main types:
- Torsion Springs: Mounted above the door, horizontally. They twist to store energy.
- Extension Springs: Located on either side of the upper door tracks. They stretch when the door closes.
Different Types of Garage Door Springs
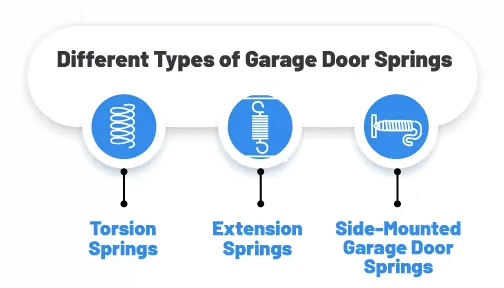
Though there are more than 5 types of garage door springs, the most common and widely used are the following 3 types:
- Torsion Springs
- Used in modern doors and popularly found on heavier doors
- Mounted over the door on the wall.
- Longer lifespan (15,000-20,000 cycles)
- More precise control and smoother operation
- A bit expensive
- Extension Springs
- Common in lighter, residential doors
- Mounted each side of the door
- Shorter lifespan (5,000-10,000 cycles)
- More bounce and less stability
- Comparatively cheaper than the torsion springs
- Side-Mounted Garage Door Springs
- A type of extension spring mounted along the horizontal tracks
- Easier for DIY but still requires caution
So make sure to know which spring type your garage door has for better understanding while adjusting.
Signs Your Garage Door Spring Needs Adjusting
Do the springs really need adjustment? Or any other issue? Make sure to check the following signs:
- Door opens unevenly or doesn’t stay up
- Garage door is heavy to lift manually
- Loud bang from the garage (a sign of broken spring)
- Opener struggles or won’t operate
- Unbalanced door
- Visible gaps or stretch in the spring
However, if it needs you can check easy DIY steps for how to replace garage door springs easily.
How to Adjust Garage Door Springs
Before starting, unplug the opener and clamp the door track to keep it from moving.
Use proper tools, like:
- Winding bars (for torsion springs)
- Safety goggles and gloves
- Adjustable wrench
- Ladder
Steps for Adjusting Torsion Springs
Caution: Torsion springs are under extreme tension and can cause serious injury if mishandled. Use proper tools, wear protective gear, and proceed with caution. If you’re unsure, call a professional.
- Close the Garage Door Completely
Ensure the door is fully closed to reduce spring tension. This is the safest position for making adjustments. - Disconnect the Garage Door Opener
Unplug the opener or disconnect it from the door to prevent accidental activation during the process. - Clamp the Door in Place
Use locking pliers or a C-clamp on both sides of the track just below the bottom roller. This stops the door from lifting accidentally while you work. - Mark the Current Spring Setting
Before loosening anything, mark the current position of the spring cone using a marker. This helps you track how much you’re adjusting. - Insert a Winding Bar into the Winding Cone
Always use solid steel winding bars that fit the cone. Never use screwdrivers or other makeshift tools—they can slip and cause injury. - Loosen the Set Screws Cautiously
With the first winding bar firmly inserted, slowly loosen the set screws on the winding cone. Keep firm control of the bar as you do this—the spring is under pressure. - Adjust the Spring Tension
Insert the second winding bar before removing the first (for safety and control).- To add tension, turn the winding cone upward (toward the ceiling).
- To reduce tension, turn the cone downward (toward the floor). Adjust in quarter-turn increments. A 7-ft door usually requires about 30 quarter-turns (7.5 full turns).
- Tighten the Set Screws Securely
Once the adjustment is complete, retighten the set screws on the cone. Make sure they bite into the shaft firmly. - Remove the Clamps and Test the Balance
Reconnect the opener. Raise the door halfway manually. It should stay in place. If it rises or falls, more adjustments are needed.
Torsion Spring Winding Chart:
The rule of thumb is to do a 1/4 turn per foot of door height.
Example: 7-ft door = ~30 quarter turns
Reference: Always cross-check with your manufacturer’s winding chart or verified technician guides for your door and spring model.
Steps for Adjusting Extension Bar Springs
Note: Extension springs can still be dangerous, but they are slightly safer for DIY than torsion types. Still use caution.
- Open the Garage Door Fully
This takes the load off the springs. Clamp the door open using C-clamps or locking pliers above the rollers to keep it from sliding down. - Inspect the Springs and Cables
Look for wear or stretch marks. Never adjust damaged springs—replace the springs on both sides at a time. - Detach the Safety Cable
Remove the safety cable carefully. It’s threaded through the spring to prevent it from snapping across the garage if it breaks. - Adjust the Hook Position
Move the S-hook (or J-hook) holding the spring to a different hole in the track hanger.- To increase tension, move the hook closer to the door.
- To reduce tension, move the hook farther from the door.
- Reconnect the Safety Cable
Feed it through the spring and securely attach it back in place. This is essential for safe operation. - Repeat on the Other Side
If your door has two springs (most do), repeat the process equally on both sides to ensure balance. - Test Door Operation
Remove the clamps and test the door. It should open smoothly and stay in place when lifted halfway.
For further clarity and visuals, consult a professional team like Upstate Doors for reliable and straightforward service.
Garage Door Spring Tension Chart
Here’s a quick idea for any standard garage door spring tension adjustments:
| Door Height | Torsion Spring Turns |
| 6′ | 26 quarter turns |
| 7′ | 30 quarter turns |
| 8′ | 34 quarter turns |
Additional reference chart (based on different door spring manufacturer data):
| Door Height | Spring Turns | Spring Wire Size | Door Weight Range |
| 7′ | 30-32 | 0.250″ | 125-145 lbs |
| 8′ | 34-36 | 0.2625″ | 145-165 lbs |
| 9′ | 38-40 | 0.273″ | 165-185 lbs |
Note: Always consult the door or spring manufacturer for exact specifications and wire gauge to avoid incorrect tension.
Is Adjusting a Garage Door Spring Safe?
No, it can be dangerous if done improperly.
Garage door springs are under immense tension and can cause serious injury if they snap or if tools slip during adjustment. According to the U.S. Consumer Product Safety Commission, more than 2,000 people suffer injuries each year from garage door-related incidents, many involving springs.
Only proceed with adjustment if you’re confident using the correct tools and safety precautions. If not, it’s always worth hiring a certified professional.
Should You Increase or Decrease Your Garage Door Spring’s Tension?
- Increase tension if the door is hard to open, doesn’t open fully, or slams shut.
- Decrease tension if the door flies open or doesn’t close all the way.
Can you overtighten garage door springs? Yes. Overtightening puts stress on the door, tracks, and opener. It can also cause premature wear or dangerous recoil. Always follow the tension guidelines and test frequently after every adjustment.
Conclusion
Knowing how to adjust garage door springs and cables can save you from costly service calls and annoying door issues. But with that knowledge comes responsibility. These springs are not toys—they store immense energy and must be handled with respect.
Use the right tools, follow safety guidelines, and refer to charts and manufacturer data before every move. If anything feels unsafe or confusing, stop and call in a professional.
However, for any garage door-related issue and solutions, contact us and get your garage door running in no time with expert assistance.
FAQs:
How do you adjust the spring tension on a roll-up garage door?
It’s almost the same as other torsion springs. To adjust the spring tension on a roll-up garage door, you need to use torsion winding bars on the spring cone located above the door. The door should be fully closed before attempting any adjustment. By turning the bars in quarter-turn increments, you can carefully increase or decrease the spring’s tension. Always test after each adjustment to ensure smooth and balanced operation. This controlled approach minimizes the risk of over-tightening or under-tensioning the spring, both of which can cause operational issues or safety hazards.
How do you wind a garage door spring?
Winding a garage door spring involves inserting winding bars into the winding cone and carefully rotating it in the correct direction—typically clockwise for adding tension and counter-clockwise to reduce it. Each full turn usually equates to four quarter-turns. Never use makeshift tools like screwdrivers, as they can slip, resulting in serious injury. The proper technique ensures even tension and helps prevent spring breakage or imbalance.
How to adjust a double-spring garage door?
When adjusting a double-spring garage door, it’s essential to adjust both springs equally to maintain the door’s balance. Uneven tension can cause the door to tilt or bind, putting strain on the opener and tracks. Turn each spring the same number of quarter-turns and check the door’s balance after each adjustment. A properly adjusted double spring system should lift the door evenly and reduce wear on all moving parts.
How many turns on a garage door spring chart?
The number of turns required depends on the height and weight of your garage door. For a standard 7-ft door, 30 quarter-turns (or 7.5 full turns) is a typical starting point. However, heavier or taller doors may require more. Always consult the garage door torsion spring winding chart and match the wire size and door weight before proceeding to ensure safety and proper function.
How many times do you tighten a garage door spring?
You tighten the garage door spring just enough for the door to open and close smoothly and stay open halfway without drifting up or down. If the door is too heavy or closes too quickly, you likely need more tension. If it flies open or doesn’t stay down, reduce the tension. Overtightening can stress the opener and damage the door system, so it’s important to test the balance after each incremental adjustment.